Overall i am really happy with the way it has turned out. i think i have captured what it is to make a skateboard video but still met the requirements of the soundtrack. Applying the videos in the correct order wasnt that hard but adjusting the soundtrack to fit nicely was a little more tricky. I made it so it started on the first trick being landed and ended on the last trick being landed, and finished with a cheer as the final trick was completed. I really liked that part of my animation as it added depth and a surprise to the film. I am much more pleased with this resubmission than i was with my first one, i have spent more time and been more careful. Above all, i have learnt a great deal on how to use after effects and the basic components of animation so i am very pleased with my achievement. I shall now go and perfect any imperfections in my personal time so i know how to correct mistakes for the future.
Thursday, 11 August 2011
Final Animation
This is my Final Animation. I had to convert it down so the file size wasnt too big for my blog. Here it is.
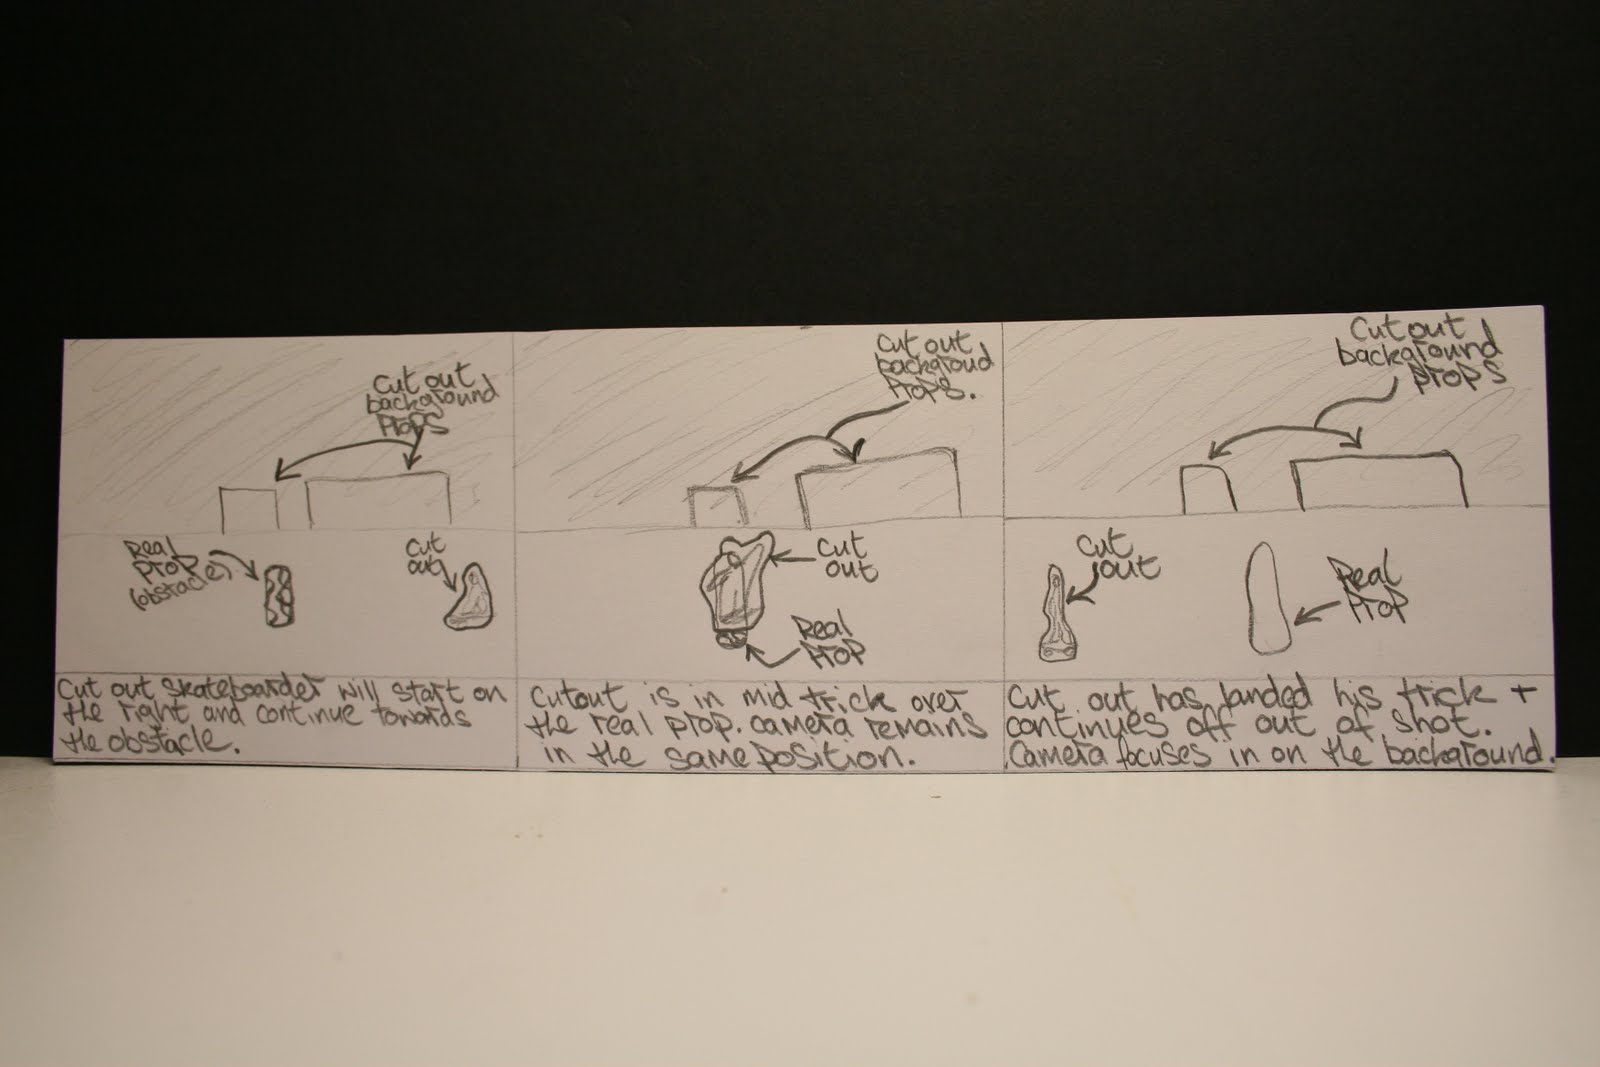
My Final Storyboard


This is my Final Storyboard. I have mixed and matched with my individual storyboards to create a sequence that i think will work the best.
After Effects Development

After importing all my images into my project panel, i then selected them all and dragged them onto the new composition icon. I then selected how long i would like to see each frame for and click okay. This then adds them all together and puts them in a sequence on your timeline ready to view.

This is how it looks when you've done this, all you need to do now is set the frame rate and you ready to play.
This is now a composition of its own so it will be much easier to work with as a pose to having a timeline full of pictures.

Next i created a new composition to the dimensions of PAL D1 Square Pixel. This brought me up a whole new composition but in the correct dimensions. Then i simply added the photo sequence composition onto the timeline of my new composition.

When shooting my animation i used a Digital SLR camera so the photos where huge, so after i added them to the timeline i selected my series of images and went to the transform menu, then scale and reduced the size of my work to 25% of the original size. This fitted perfectly in my correct area size.

Next i came out of After Effects and entered an audio cutting program called Power Audio Cutter. This is the software i used to cut down my skateboarding sound effects so that they would be easier and more manageable to use in After Effects.

Here i have inserted the sound clip that i cut down and adjusted it to fit nicely on top of my movie clip.

After deciding that the clip was finished i then added it to the render queue and selected the appropriate setting for exporting it as a quicktime movie. I then made sure i checked the audio box because if i didnt after effects would not render my audio. When all was done i set it to render and waited for my clip to be finished.
I did this to all my individual clips.

There we have it, my clip played perfectly, I used this process on every one of my individual skate clips and then i shall import all the videos into a new composition and add my assigned soundtrack.
My Stop Motion Clips
These were the first three clips that i made, I am really happy with them especially the two that i have used background cutouts for, they add so much character to the trick.
These were the second three animation clips i made, i have tried to create an atmosphere by continuing to use the background cutouts. Also i have tried to copy the camera angle from the original snapshot sequence to enable me to get the fluid motion of the athlete as near as possible to the real thing.
These are my last three clips. These are my favorites ones so far. I have picked up a lot of little techniques such as taking multiple pictures at the beginning and end to stop the clip from being so quick and cutting off so fast, and i have learnt how to chop up and apply sound effects. These techniques have helped me to create these animation accurately.
This is my final trick, in skateboard videos the last trick is always the best or the most technical or difficult. There is no exception with my animation. I have aimed for this trick to be the best and it is. By using a low camera angle i have been able to make the obstacle he is using look massive, just like they do in real skateboard films. I have used the correct camera angle and a very fitting sound effect. I even chose a sound effect that had some cheering on it which defiantly added a spot of liveliness and character.
Wednesday, 10 August 2011
Storyboards
I decided to create an individual storyboard for each of my clips then i could rearrange them into an order i liked and stack them up to create my final storyboard.


My Setup
This is my scene that i would be using for all my stop motion clips. I have some black board for the background, this will make it easy for me to attach any background props to them. I may use some background cut outs to make the scene not look so bland and to add some character.


This light is very useful because it is fully maneuverable so wherever i need the light to be entering the shot iv got it.
Subscribe to:
Posts (Atom)